Thursday, February 10, 2011

5 Creative Things You Can Do with Pinwhirl Pinwheels

Have you seen the little pig in that Geico commercial holding pinwheels out the window of an SUV while he screams "Wheeee!" in sheer delight? That's how we feel about pinwheels too!

The really great thing about our Pinwhirl items is that they can be used for so much. Here are a few fun ways that you can incorporate Pinwhirls in party decor and more!


1. Embellish a bouquet or floral arrangement.

2. Make a pinwheel boquet or centerpiece.


3. Make a Pinwhirl boutineer.
 

4. Create festive place cards.


4. Top cakes and cupcakes.


What creative uses can you come up with?


To purchase items featured in this article, visit our Pinwhirls Online Shop. Brides, don’t miss out on our special offer! Learn how you can save 10% on your order.

Tuesday, February 1, 2011

How to Plan a Classroom Valentine’s Day Party


Classroom Valentine’s Day parties are so much fun, but it’s already February and you don’t have much time left to plan! We're here to help with fun tips for your child’s classroom party. We've got ideas ideas for everything from decorations to games and super sweet treats.

To pull off a great classroom party, make sure you have these 5 things covered:


Valentine’s Day Party Favors

There’s no such thing as a party without favors. At Pinwhirls, we’ve got you covered with pinwheels that are colorful and fun! Swirling, twirling hearts and spinning stripes can be used to decorate goodie bags or as Valentine’s Day cupcake toppers. Children love to make them spin. For older children, try our do it yourself pinwhirl kits.

Games & Crafts

The game or craft you choose will depend a lot on how much time you have, but you simply must have a fun activity planned for the kids! Some of our favorite crafts include making personalized Valentines to give to mom and dad, making woven paper hearts, and stamping fingerprint hearts.

If you need a simple but fun game for the whole class, how about a Valentine’s Day themed scavenger hunt? Send the kids searching for cupid, St. Valentine, red hearts, pink bows, flowers, stickers, markers, pencil toppers, and whatever else you can think of. Other activity ideas we like include making your own Valentine’s Day word searches and trivia games. Don’t forget the prizes!

Valentine’s Day Cards

The great thing about kids’ parties is that Valentine’s Day is pure fun. There’s no pressure. Everyone gives cards and everyone gets cards. You can make the cards with your child ahead of time using beautiful craft papers or buy a boxed set.


Pinwhirls make great Valentine Mailbox Decorations
Valentine Mailboxes

Creating customized mailboxes for all of those classroom Valentine’s is a lot of fun. Using markers, craft paper, glue, stickers, glitter, and more you can let the kids go crazy decorating shoe boxes, tissue boxes, instant oat canisters and more.


Sweet Treats

No party is complete without some yummy treats to share. Store bought treats like conversation heart candies and chocolate hugs and kisses are sure to please, but you can also try cupcakes and cookies. For an extra special party, prepare cupcakes and cookies ahead of time and let the kids decorate their sweets with frosting and candies.

Once you’ve got these five Valentine’s Day party ideas covered, you’re all set! May your Valentine’s Day be lovely and sweet!


To purchase items featured in this article, visit our Pinwhirls Online Shop. Brides, don’t miss out on our special offer! Learn how you can save 10% on your order.

Tuesday, January 25, 2011

5 Tips for Planning a Summer Wedding

Photo courtesy Christine Lim and Ruby Yeo
Got your heart set on a summer wedding? We don’t blame you. It’s a beautiful time to say I do—whether your ceremony takes place at a picture-perfect park, at a sandy beach destination wedding, or in your own back yard garden.

Try these five tips for planning a perfect summer wedding.

Plan, plan, plan!

You won’t be the only bride arranging a summer wedding. Getting what you want sometimes means beating another couple to the deposit. We recommend planning a year ahead, if possible. Otherwise you might find that your reception venue is already booked. Also, start dress shopping immediately. You don’t want to fall in love with the perfect gown only to find you need a specially ordered size or require alterations.

Select your colors and theme.

Your life will be much easier if you select a color palette before you start shopping for bridesmaid dresses, wedding invitations, wedding favors, and flowers. It helps you narrow your choices and keeps those panicky I-can’t-make-a-decision feelings at bay. Alternatively, you might find color inspiration from a single must-have item, like a custom Pinwhirl. Bright colors are great for summer weddings, but shimmery pastels work too—especially for evening weddings. Don’t forget to select colors that will show well in pictures!

Narrow your food options.

When it comes to food, try lighter fare. You might opt for a buffet or a sit-down dinner, but don’t forget about food safety. Keep your guests’ comfort in mind if you’ll be eating outdoors. Excessive heat, bugs, and wind are all potential problems for the outdoor summer wedding. Picnics, barbecues, and seafood spreads make excellent catering choices for your summer wedding.


Choose decorations and favors.

Lots of summer weddings have cheery, whimsical themes that are perfect for favors with striking colors and fun shapes. Customized Pinwhirls make great favors, cake toppers and decorations. Set them atop your cupcakes for a fun and dramatic splash of color, or use pinwheels instead of traditional place cards for something unique.

Pick your flowers.

You shouldn’t have trouble selecting wedding flowers for a summer soiree unless you simply can’t make up your mind. There are so many beautiful flowers in season during the summer months. If your colors are bright and bold, try dahlias, roses, sunflowers, zinnias, orchids and calla lilies. If you want understated color and muted undertones, try white lilies, hydrangea, Shasta daisies, or white roses.


To purchase items featured in this article, visit our Pinwhirls Online Shop. Brides, don’t miss out on our special offer! Learn how you can save 10% on your order.

Wednesday, January 19, 2011

Abby and Asher's Wedding: Pinwheels and Pennants


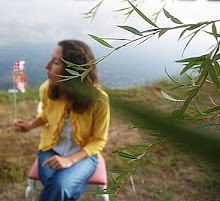
Abby and Asher's (pictured above) Australian wedding was just beautiful, and they were kind enough to share photos of their special day with me.

Abby opted for the do-it-yourself pinwheel kits and assembled the custom wedding favors herself. A huge task since she literally ordered hundreds. We started working together in early summer, getting the details in place for her November wedding.


Small Handheld Pinwhirls


Cupcakes with Custom Cupcake Topper Pinwheels


Handheld Pinwheels


Pinwhirl Path


Pennants Adorn the Gazebo

For more about this wedding you can visit Abby's blog, Something About Dinosaurs.
Also, many thanks to the photographers, Christine Lim and Ruby Yeo for allowing us to highlight their photos on our blog.

Browse our online shop at Pinwhirls.com for custom pinwhirls, pennants, invitations, kits, and more.

Thursday, November 18, 2010

Jingle Jingle Jingle

Jingle Jingle Jingle
You will hear these pinwheels ring!
...
Just in time for the holidays
we are introducing our newest pinwheels.
...
Our 2010 Holiday Pinwheels
feaure either shimmering snowflake centers
OR
jingle bells that actually ring.
...
They are too cute and make just the slightest ring.
They can be purchased at our Etsy shop.
After the holidays, these ringing pinwheels
will also be too cute for bride/groom send-offs!
...
Also perfect for those reception sites that don't
allow tapping of the glasses.
Just ring these cuties instead!
...
On another Holiday note
the Drehers are all decorated for Christmas.
Yep, you heard me correctly.
We decorated, with the help of some friends, last weekend.
Such a relief to have it done.
Hoping this will allow me some time to relax around
the holidays this year instead of spending so much time decorating.
...
I'm also looking forward to the upcoming Turkey Day.
Have already baked pumpkin bread.
Yum.
...
On that note, Gabers is getting up so I best be moving right along.
Hope everyone has a safe and yummy Thanksgiving!

Tuesday, November 2, 2010

You are Invited to our Monster Laboratory!

Late in the summer I found the above costume for my little Gabe.
I showed it to Hubby and he agreed that it was the first perfect costume for our little Slobber Monster. Fast forward a couple of months and I decided to host a Halloween Party. I battled back and forth between a "Pinwheels into Pumpkins" theme and a Monster themed Halloween party. Not because I didn't totally love the Monster theme, but because I'd already sort of had this theme in mind for his first birthday party. But, as you can see the Monster Laboratory theme eventually won out as it just went so perfectly with his costume! I designed the above invite to invite all of our guests - I couldn't help but plaster our little slobber monster on the invitation ...
as well as the above little monsters. {Aren't they the cutest?} They, as well as a few other designs, were also used throughout the party on food tents, hang tags, food bags, cookies, etc.

Guests were welcomed to Gabe's Monster Laboratory by luminaries and ghoulish gourds. I made the above wreath with black tulle and festive ribbons.

Upon entering, they were greeted by Miranda, the Mannequin and by Gordon's Green Glittery Hands.

Pre-dinner spooky snacks included these handmade S'mores Caramel Apples.

As well as Hauntingly Hot Potions including Orange Hot Chocolate, Ghost {White} Hot Chocolate, and Spooky Spider Cider.

Party cones filled with Cinnamon & Sugar Kettle Corn and Chocolate Kettle Corn were also available.

For the kiddos, we also had a 'Buffet of Body Parts' which included body shaped gummies from ears, to noses, to severed fingers and toes.

My favorites - the gummy eyeballs, brains, and fangs!

Next we move onto the 'Tower of Treats' as I'm a firm believer in eating dessert first {or at least saving room for plenty of it}! The Tower of Treats featured an abundance of sweets including ...

Cookie Monsters
...
Home Made Butter Cream icing between two Oatmeal-Cranberry-Walnut cookies
...
A tie for my favorite dessert!
Monster Head Cupcakes {Butter Cream icing atop red velvet cupcakes}
Shots of Monster Blood {Tapioca Pudding featuring lg dyed tapioca pearls}
...
For decor we used black and white fabric as a backdrop as well as shreds of ghoul cloth. We also filled beakers with lg dyed tapioca pearls and mini m&m candies.
...
'Eye'ffles {Handmade chocolate truffles - the other tie for my favorite dessert!}
Monster Cookies {designed by Whimsical Originals - notice how she replicated our monsters perfectly!} The Monster Cookies were definitely the visual hit of the party!

Cherry Brain Parts {shortbread tarts filled with cherry pie filling and freshly made whipped cream topping piped on to form a brain topping}.

Marshmallow Monster Teeth {square vanilla marshmallows dipped in colorful candy melts}

Brain Jello {cherry Jello brain}
Skull Cake {handmade by my sister}
Brain Juice Punch {complete with floating eye balls}
Centerpiece on the food table included flickering candles, beakers filled with colored water, dyed tapioca pearls, and mini m&m candies. Instead of traditional glasses, guests drank out of plastic beakers {as they needed to be kid friendly} and monster grin straws.

Candy Eyeball drink stirrers were a huge hit with the kids.

For dinner we served, Decomposed Salad, Monster Eyes {sausage balls} ...

... Breadstick Bones with Monster Blood {pizza sauce} ...
Rigaboney {not shown}, Spooky Spaghetti Noodles {black and orange spaghetti noodles - not shown} with Butternut Squash Pasta Sauce {not shown}.

Parting Favors included test tubes {plastic for the kiddos} filled with candy bones. The die cut labels read 'Thanks for Jointing Us!' {You get it? Bones - Joints!} And who could forget about the cute little Monster Cookies! Guests also had goody grub bags available to bag up the over abundance of treats from the party. I surely didn't want all of the sweets sitting around my house after the party. :)

The party was a monstrous success - although there was a fire ban in our county {due to lack of rain} so we couldn't tell ghost stories or roast marshmallows by the fire. Boo-hoo. But it was still great fun for all of the costumed guests including myself {zombie nurse}, my hubby {mad scientist}, Gabe {slobber monster}, sunbathing beauty, two mummies, Juno, lumberjack, ballerina, scary creature, old man Superman, Cleopatra & Caesar, Spiderman, Batman, Giraffe, and a Pirate!
...
To view larger photos of the party just click here!
...
Although this was a Halloween themed bash, I imagine this party being super cute and creative throughout the entire year! Select items from the party will soon be available for purchase on our website.
....
How to replicate the party:
Monster Costume - One Step Ahead
Monster Cookies - Whimsical Originals
Monster Invite - Crossroads Cottage
Monster Food Tents - Crossroads Cottage
Party Cones - Crossroads Cottage
Hang Tags - Crossroads Cottage
Bag Tags - Crossroads Cottage
Treat Bags - Crossroads Cottage
Monster Grin Straws: Crossroads Cottage
Ghoul/Mummy Cloth/Fabric: Jo Ann Fabrics
Black and White Fabric: Hobby Lobby
Black Flickering Candles: Hobby Lobby
Beakers, Flasks, and Test Tubes: LCM Lab
White Serving Dishes: HomeGoods and Target
Silver Skeleton Salad Forks: Target
Gummy Brains, Eyeballs, and Fangs: Target
Gummy Eyeball Ice Cubes: Target
Eyeball Drink Stirrers - WalMart
Skull Cake Pan - Wilton
Eyeball Candies - Hobby Lobby
Brain Mold: Spirit Halloween
Manequin Head: Spirit Halloween
Glittery Hands: HomeGoods
Tulle Wreath: Crossroads Cottage
KettleCorn: Popcorn Indiana
Paper liners: Jo Ann Fabrics
Tulle and Ribbon for Wreath: Hobby Lobby

Food Recipes:
Brain Juice Punch:
2 bottles sparkling white grape juice
2 gallons orange juice
2 L lemon-lime soda
1/2 gallon orange sherbert
Combine sparkling grape juice, oj, and soda in a lg punch bowl. Scoop sherbert into bowl until it has produced a nice scum over the top. Garnish with a full tray of gummy eyeball ice cubes.
Other hints:
- Monster Cupcakes: Make the cupcakes and icing ahead of time and ice. My sister and I made them a week ahead of time and stored in the freezer until the morning of. Don't add the eyes until day of party.
- Cookie Monster Cookies: We also made the cookies and icing 1 week before the party. They also froze perfectly. Eyes were added before freezing.
- Chocolate Eye Truffles: Followed the recipe on the back of the baker chocolate box. Rolled the balls in sprinkles and added the eyes. Add eyes before rolling in sprinkles. They were also frozen the week before the party.
- S'mores Caramel Apples: Made the night before the party. I'd never worked with Caramel before. Yowsers the caramel cooled quickly - within 5 seconds. I used the individually wrapped caramels out of the bag. The secret was putting the crushed grahams (to make things simpler I bought the grahams already crushed from the baking section), mini chocolate chips and mini marshamallows all in the same dipping bowl. Also I had to cut the mini marshamallows in half so they didn't look quite so large on the apples.
- Cherry Brain Tarts: I also used pre-made shortbread tarts and cherry pie filling from the baking section. I added a bit of cinnamon to the cherry pie filling just because I LOVE cinnamon.
The whipped cream was home made. The colors turned out a bit too pastel for my liking, but if I added more and mixed the cream more I would have risked overbeating the cream. {I added the coloring after beating}. Next time I might try adding the coloring before beating ...

Tuesday, October 19, 2010

Hostess with the Mostess

Sometimes a girl just needs to twirl with delight.
...
And recently I've twirled twice
...
as my pinwheels were featured in parties on
one one of my favorite blogs
...
...
Several weeks ago they were featured in a
Bright and Bold Butterfly themed party
by Rebekah with A Blissful Nest.
...
If you are in a down mood now that the drearier days of
fall are upon us just visit the post about the party
...
it will surely brighten your day!

And
...
just recently Amy with Amy Nichols Special Events
emailed to let me know that her Bouncy Ball Themed event was
also featured on the Hostess with the Mostess blog.
...
I loved working with Amy on these pinwheels as the theme was so creative.
Although it was ball themed, it was a subtle ball theme with lots of circles and polka dots
instead of the traditional sports balls.
...
Love how it turned out!
You will too.

...
I'm also twirling with delight as fall is here and things have slowed a bit.
I finally have time to breath.
...
This has allowed me to spend some more time with my Little Gabers
who is growing way too fast
...
to check out some recent photos on/around his 6 month birthday click here.
...